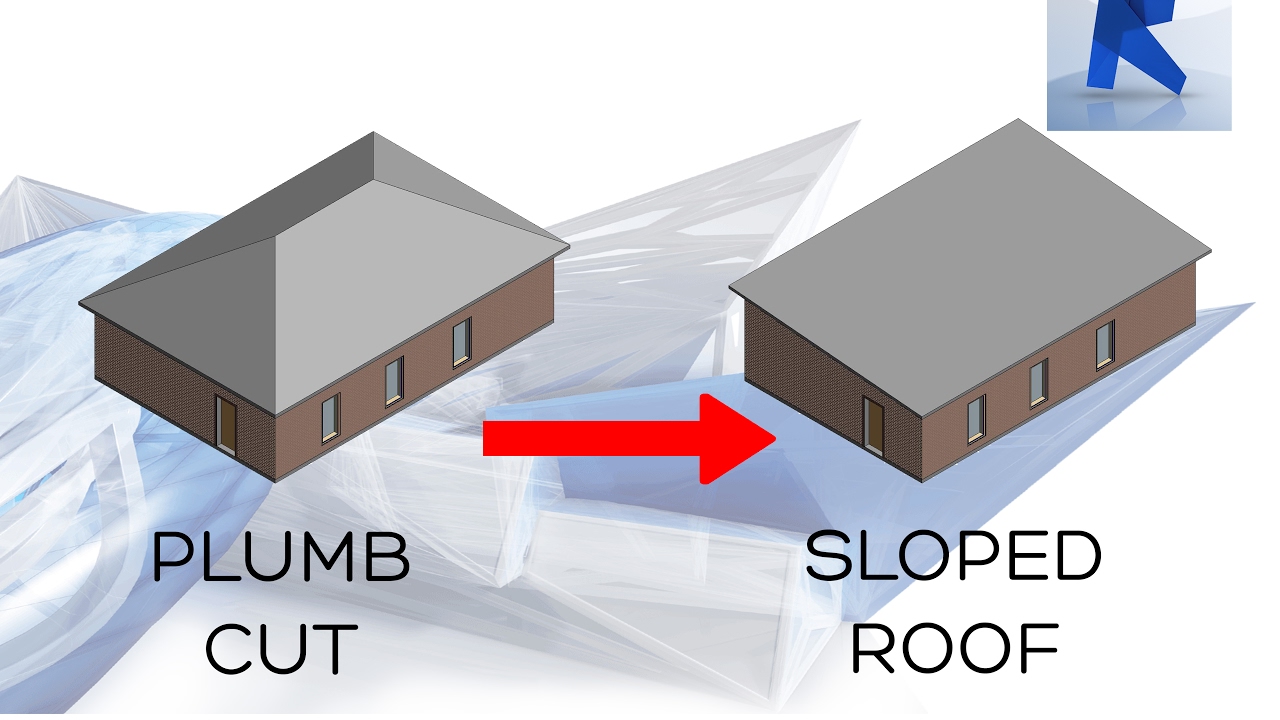
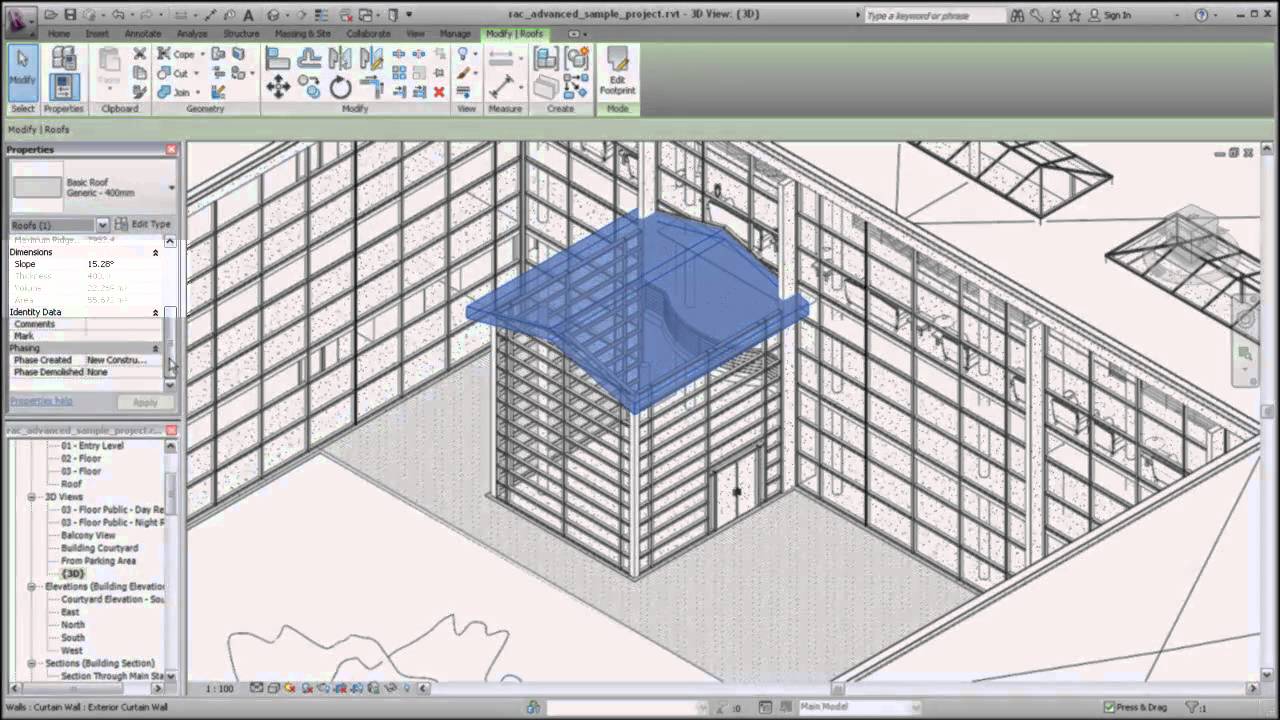
In the option bar make sure define slope.
													
																	Slanted roof revit. 


																	In the option bar make sure defines slope is. 
																	8 tips to create sloped roofs in revit 1 check define slope to create a sloped roof. 
																	Create a sloped roof in revit step 1 draw your roof step 2 define the slope. 
																	Want to create a sloped roof. 


																	2 modify properties to adjust roof slope. 
																	The unheard truth from the bible. 
																	On the properties palette select or clear defines roof slope. 
																	To specify roof pitch select a slope defining boundary line click the numeric slope definition in the. 


																	2 activate slope to create a sloped roof. 
																	To create a sloped roof in revit modify the footprint sketch of the roof by selecting and specifying the slope defining edges of the roof. 
																	Want to create a sloped roof. 
																	When editing the roof sketch select the edge or edges you would like to slope and select defines slope on the options bar. 


																	Create a roof slope using the defines slope property in sketch mode select a roof boundary line that defines slope indicated by. 
																	Want to create a flat roof. 
																	3 modify properties to adjust. 
																	For biblical insights please listen to this podcast. 


																	You can use any. 
																	In the drawing area angle icons identify which lines of the sketch define slope. 
																	3 modify each.